Latest Posts
Hi everyone! Today I am gonna show you how to make easy stamps using foamic sheets (a.k.a craft foam)! If you have nice cutting skills, you can cut out even more complex shapes. But if you are a beginner, you are good to go with basic shapes to!


Materials:

Foamic Sheet (Craft foam)
Cardboard
Ink and a paintbrush (or a stamp/ink pad)
Glue
Scissors
Pencil
Paper

How to make:

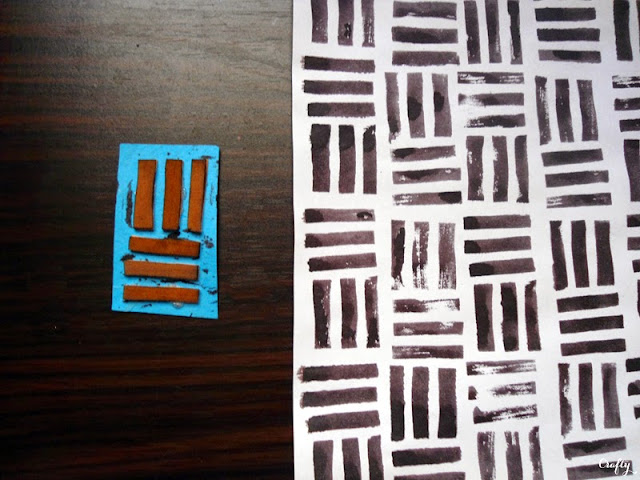
1. Start drawing and cutting your desired shapes from the foamic sheet. Stick the shapes on the cardboard (mirrored if required). Cover the foam with ink.


3. Stamp! To achieve patterns, stamp in lines and in :-:-: pattern.


3. Use your stamps to decorate cards, tags, gifts, etc.


I hope you liked this tutorial! Thanks for reading and stay tuned for more creations made using these stamps. Let me know your thoughts in the comments.

Featured on: craftgawker
Hi everyone! Check out my first instructable!
It's an insanely easy pouch which you can make in no time. It's also perfect for beginners! I have rewritten the tutorial for the blog.

No-Sew Foam Pouch

Materials:

Foamic sheets in desired color
White paint (optional, for decorating)
Stapler (with staples, of course)
Paintbrush (of course if paint is used)
Tape (optional, for decorating)
Scissors
Pencil
Ruler

How to make:

1. Use a pencil and ruler to measure and to draw out the final shape of the pouch. If you are using a single large sheet, fold the sheet in half, so after cutting out you get two pieces.

2. Decorate it. I taped four stripes of tape at an equal distance and then I started painting the portion white. It took a bit of time to dry. Then I took off the tape. You can decorate it as you like.

3. Start stapling your pouch. Make sure that the the lower staples are close. The ones on the sides should be close to, but they are not as important as the lower ones are because most of the weight of your items in the pouch depends on them.
        Staple it up

That's it! You can use it to keep any light weighted item. It can also be used as a pouch for your phone.

Thank you for reading. I hope everyone will like and make sure to tell out your thoughts in the comments :) Good day!


Hi everyone! This is my second tutorial today. It's an anthro inspired one.


I saw this on Anthropologie's site for $48, the price goes up to $58:
Wire Script Sculpture


My version:


Materials:

Wire
Pliers
Thread
Wire Cutter
Paper (optional)
Pencil (optional)

How to make:

1. Take some thick wire. Mine was old and was kinda tarnished, you might wanna paint your's if it's new and isn't being much visible against your wall. Start bending the wire according to what you'll want it look like. To make it easier, write something on paper (in cursive writing) first and then follow the directions of the curves and letters. I altered the spelling of 'pretty' to 'preety' just for fun :D


2. Tie both ends with a long piece of thread and hang it. Thats it! You can also you use it as a jewelry display.


It's not hammered into the wall like the original, but it does look similar. I hope you liked this tutorial. Stay tuned for more and let me know your thoughts in the comments!

Featured on: craftgawker

Hi everyone! Today I had to make something simple for my school's art project. I saw this anthro inspired organizer on Pinterest.

And this is my version (not completed):

Materials:

2 or more different sized Pringles cans or similar containers
Gold spray paint or any other colored spray paint
Cardboard
Clear glue
Foamic sheet
Lace, Masking tape, paper etc. for covering the edges

How to make:

1. Prepare your items: containers & cardboard. Spray paint them in gold or any other color.


2. Glue pieces fomic sheet on the bottom, to fill the empty space between the containers and the base. Glue the edges and then stick it to the cardboard. For more sturdiness, glue around the edges.


3. It's almost done! Glue some paper, masking tape or paper to cover the rough edges and spray paint. (not pictured)


I hope you liked it. It was smaller than the original. Let me know your thoughts in the comments and thank you for reading!


Hi everyone! Finally, today I got some time to publish a new post, so here it is! It's really simple, quick and easy to make. The only thing I am missing are clamps. I couldn't find them in my area. If they are available, I recommend you to use them to get best results.


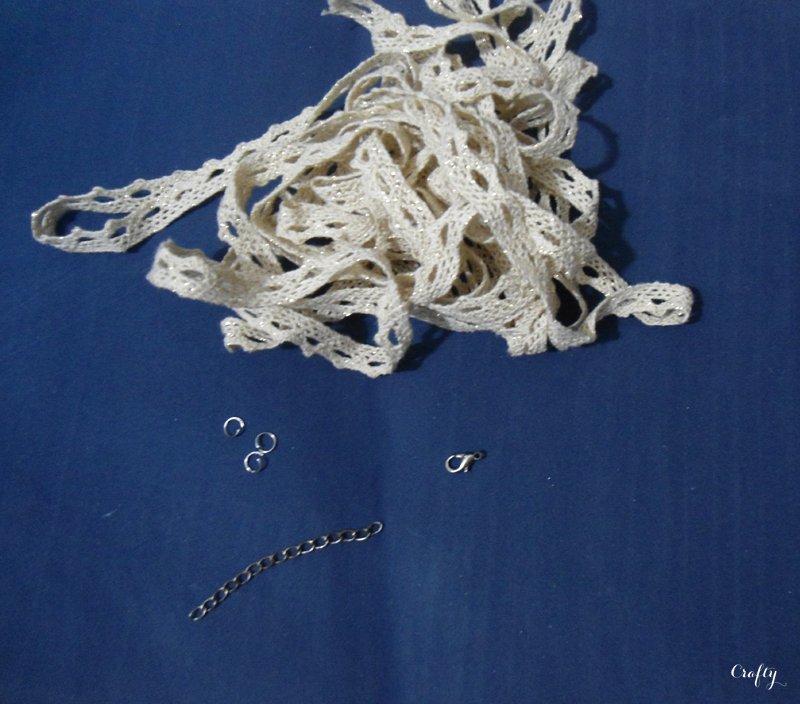
Materials:


Clasp
Jump rings
Extension chain (optional)
A thin & delicate lace
Clamps (recommended)

How to make:

1. Wrap a length of lace around your wrist. Cut it accordingly.

2. Add a clasp on one end with a jump ring. Add an extension chain on the other with a jump ring. I changed my mind and used jump rings instead of a extension chain.

3. Done! I wish I had clamps :( but it's ok the rough threads won't be much visible. It's thin so I'll layer it while wearing.

Layer it with other bangles and bracelets. I hope you liked it. Let me know your thoughts in the comments. Thank you for reading and may you have a nice day :)

P.S: The images from now on will be in lower resolution than before. It took me a lot of time to upload so I did this.
Hi everyone! Today I am gonna post a tutorial which will give you an idea to freshen up your old iPad case. It's very simple and easy and looks very classy. I had some spray-painted lace fabric and it was very stiff now. I just recycled it.


Materials:

Lace (15-25 inches long)
Scissors
Tape
An iPad case (I am using a portfolio)

How to make:

1. Wrap the lace around the case vertically.

2. Tape it on the case at the back of the flap. If it's long; stretch it, overlap it and tape the lace only. It will create a band.


3. Enjoy! Here are the examples of it on black and white cases. Both of them were experimented with two kinds of lace.


I am so fond of lace...

I hope you liked this tutorial as it is a very easy one, again. Let me know your thoughts in the comments and stay tuned for more!

Featured on: Totally Tutorials
Hi everyone! Today I'll be posting an Anthro-inspired DIY tutorial, which are common during these days...


Yesterday day I visited Anthropologie's site and I saw this for $48:

Hedda Tassel Necklace by MADE
It seem to be so simple and easy to make so I gave a try. It's primarily made of leather, but I didn't had leather at home so I opted for another fabric.

Materials:

Fabric (I chose cotton)
Saffron colored thread or golden colored wire
Gold Chain
A paint brush or something else for supporting the tassel
Scissors

How to make:

1. Roll up some fabric. Fold it in half and tie to a paintbrush or something else with the thread or the wire.

2. Cut the excess and cut fringes in the roll. Neatly cut the rough and raw threads.

3. I prefer to make it look a little rough so I did not cut off all the threads. There you go, it's ready!


I did this just for fun, It could have looked more fine if I made it seriously :D Well it is at least fine to be worn, because the threads aren't visible from far away... It will look better if leather is used. Let me know your thoughts in the comments and stay tuned for more!
Hi everyone! Today Ms. Khadija gave me some blogging tips and now I am gonna imply as much of it as I can on this post. This is one of the most easiest projects which will take less than 5 minutes to make. The best thing is that it's 2-in-1 piece of jewelry so you can wear it as a bracelet or a pendant chain. It's chic, cool and hipster to.


Materials

Chain of desired color (I chose grey) and of desired size
Jump rings
Clasp (I chose bronze colored)
Extension chain matching the clasp's color
Pliers (optional)


How to make:

1. Attach jump rings to the of the ends of the chain.

2. Attach an extension chain and a clasp using the attached jump rings on the ends.


4. Now wrap it up and wear it like a bracelet,


5. Or wear your favourite pendants!


This is one of the most easiest projects I've ever came up with. This could be somehow a valentine's day special project because it's a coincidence that I am posting it on this day. Happy Valentines Day to those who celebrate it (atleast I don't :D). Let me know your thoughts in the comments and stay tuned for more crafts!